Server Message Block (SMB) is a foundational service that has been
used for many years. This internet standard protocol enables Windows to
share files, printers and serial ports. SMB is used over the internet on
top of the TCP/IP protocol.
SMB v1 has been in use since Windows 95, and in 2019, it’s
still often found and abused in networks. If you have SMB v1 enabled in
your network, it can be used in blended attacks that might include ransomware and other malware. In a 2016 blog post, Ned Pyle lists the protections you lose when using SMB v1:
Better message signing (SMB
2.02+). HMAC SHA-256 replaces MD5 as the hashing algorithm in SMB 2.02,
SMB 2.1 and AES-CMAC replaces that in SMB 3.0+. Signing performance
increases in SMB2 and 3.
As Pyle points out, “The nasty bit is that no matter how you
secure all these things, if your clients use SMB1, then a
man-in-the-middle can tell your client to ignore all the above. “
How to detect and disable SMB v1
You
can use various means to disable SMB v1 in your network. For example,
you can use group policy to disable it with a registry key as noted in a
2017 blog post. In addition, you can follow the guidance in KB2696547 to detect if SMB v1 is still in use in your network and to gracefully disable it.
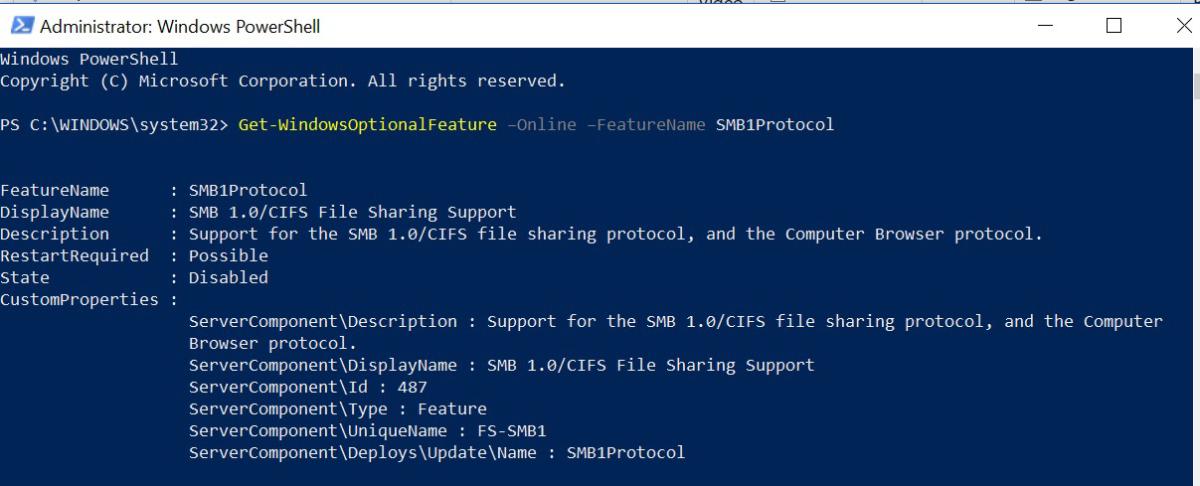
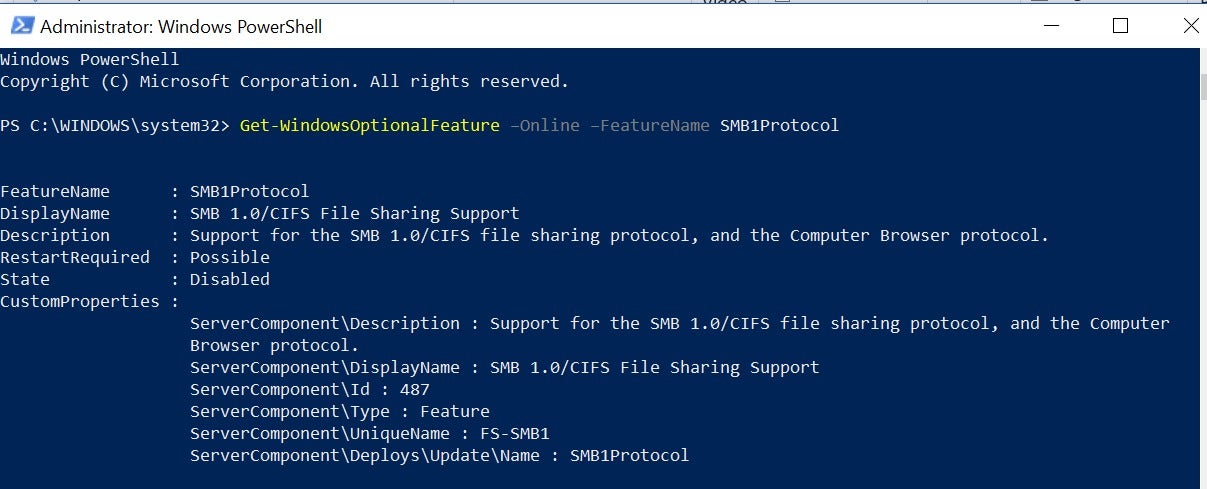
On Windows 10, you can use PowerShell to determine if SMB v1 is enabled on your computer. For example, the command Get-WindowsOptionalFeature –Online –FeatureName SMB1Protocol on my Windows 10 system provides the following information: Microsoft
Determining support for SMB v1 You might find that older copiers and printers or older
network-accessible storage still depends on SMB v1 to be functional. You
need to determine if the risk of SMB v1 is acceptable, or you can
contact the vendors on your impacting devices to determine if you can
get a firmware update to support SMB v2 and SMB v3 on these older
devices. There is even a list of products that demand SMB v1. If you are having issues disabling SMB v1 at home, check out the guidance on the Barbs Connected World blog.
Next, as recommended by the U.S. Cert,
you can block SMB v1 at the firewall and internet. Most firewalls do
this by default, but review if yours automatically blocks all SMB
versions at the network boundary. It would do so by blocking TCP port
445 with related protocols on UDP ports 137-138 and TCP port 139.
Take the time now to review your SMB v1 status and tighten up your Server Message Block
source link The WSUS client agent may not report to the WSUS server for many reasons. Here I'll go through some of the reasons and how you can troubleshoot the process. There are also some situations you may run into where some or all clients stop reporting to the server and these steps will also help for those scenarios as well.
1. Make sure that the client has the proper WSUS settings
On the client run gpresult or rsop.msc to make sure that the details of the WSUS server exist. If not then a couple possible causes include:
The system does not have the group policy from the Domain.
The Group Policy is not been targeted to the client system.
To address this, you need to make sure that the group policy is successfully updated on each client and that the WSUS setting is properly configured. For more information on this see the following TechNet documentation: Configure Automatic Updates by Using Group Policy In case you are using a registry modification or local policy make sure that the same is applied. The registry location where the WSUS server configuration is stored is below: [HKEY_LOCAL_MACHINE\Software\Policies\Microsoft\Windows\WindowsUpdate] "WUServer"=" http://>"" "WUStatusServer"=http://> …etc Further options on the WSUS Agent settings are available here: [HKEY_LOCAL_MACHINE\Software\Policies\Microsoft\Windows\WindowsUpdate\AU] "AUOptions"=dword:0000000X …etc You can find more details on how you can use scripts to configure the WSUS settings from the following link: http://msmvps.com/blogs/athif/archive/2005/09/14/Manually_Configure_WUA.aspx Once you have made sure that the WSUS settings are configured correctly you can move on to next step.
2. Make sure that the agent services are up and running
You need to make sure that the WSUS agent service (Automatic Updates) and BITS (Background Intelligent Transfer Service) are running. The System\Application event viewer events can help you identify and troubleshoot this issue. If you suspect your issue may be related to issues with the Automatic Update or BITS services, here are few links that can be helpful in troubleshooting these types of issues: KB331716 - List of known issues for Background Intelligent Transfer Service (BITS) KB969632 - Background Intelligent Transfer Service (BITS) does not start in Windows XP, and you receive a message in the System log: "The Background Intelligent Transfer Service service terminated with service-specific error 2147500037 (0x80004005)" KB883614 - You receive a "Windows Update has encountered an error and cannot display the requested page" error message when you try to install an update KB959894 - Error message: “The necessary service "Automatic Updates" (WUAUSERV) is not started or Background Intelligent Transfer Service (BITS) is disabled. Error 0x8DDD0018” or Error codes 0x80244019 or 0x80070422 when attempting to install updates.
3. Make sure the WSUS server is reachable from the client
There is network related issue (e.g. there's a proxy configuration issue, etc.).
One of the most common issues we see is the proxy issue. For that you can check the windowsupdate.log (C:\windows\) and see if there are any proxy related errors. If yes then you can run the proxycfg command to check the win http proxy settings. For more information on the proxycfg command you can check the following link: http://msdn.microsoft.com/en-us/library/ms761351(VS.85).aspx Most of the clients will have the proxycgf utility but if not then you can download it here: KB830605 - The Proxycfg.exe configuration tool is available for WinHTTP 5.1 If you are finding proxy errors then what you can do is go to Internet Explorer –> Tools -> Connections –> LAN Settings and configure the correct proxy and make sure you can reach the WSUS URL specified. Once done you can copy these user proxy settings to the win http proxy settings using the proxycfg –u command. Once the proxy settings are specified you can run wuauclt /detectnow and check the windowsupdate.log for errors.
4. Make sure the agent is healthy and working
If you still have errors you can check the windows update agent version. The details on how to do this are here: http://technet.microsoft.com/en-us/library/bb680319.aspx If you find that the agent is not up to date then you can update the windows update agent to the latest here: KB949104 - How to obtain the latest version of the Windows Update Agent to help manage updates on a computer For more information see http://technet.microsoft.com/en-us/library/bb932139.aspx You can also use the utility provided in KB971058 that will help you to sort out most of the issues with the agent. Once you've run the fix or updated the agent you can run wuauclt /detectnow and check the windowsupdate.log to make sure there is no issues.
5. Automatic Update Agent Store is corrupted
When we have issues with the ability to download updates and we're experiencing errors relating to the software distribution store then try the following on the client:
a. Stop the Automatic Updates service b. Rename the software distribution folder (i.e. C:\Windows\SoftwareDistribution). c. Restart the Automatic Update service d. Run wuauclt /resetauthorization /detectnow e. Run wuauclt /reportnow
6. Clients with the Same SUSclient ID
This issue can happen when we image systems and the clients end up having the same SUSclientID. The result is that only one among these clients will appear in the console. You may also see that out of a group of these clients, only one appears at a time but the exact one that does appear may change over time. For those clients that are not registering due to the SUS GUID issue we can use the following:
a. Stop the automatic service b. Delete the SUSclientID reg key
c. Restart the automatic service d. Run wuauclt /resetauthorization /detectnow e. Run wuauclt /reportnow
7. Conflicts with System Center Configuration Manager
This can occur if ConfigMgr 2007 had been previously installed on the server as a Software Update Point (SUP) and Automatic Update reporting events was set to "Do not create WSUS reporting events". The solution is to revert the setting back to "Create all WSUS reporting events" unless ConfigMgr 2007 was uninstalled. An alternate solution is to use this application to change the level of reporting.
Since OS X Mountain Lion,
the Mac defaults to preventing applications from unidentified
developers or sources from being launched. You’ll discover the message
in OS X 10.8 when you try to launch a Mac app that didn’t come from a
verified source or from the Mac App Store, and you’ll get an alert
dialog that says “[App name] can’t be opened because it is from an unidentified developer”.
This new security feature is called GateKeeper, and it doesn’t mean you
can’t run those unverified apps on the Mac, you just have to either
temporarily skirt the security blanket of GateKeeper, or turn off the
app limitations entirely.
Temporarily Get Around “App Can’t Be Opened” Gatekeeper Alert Message
This is probably the best option for most users, since it maintains some security:
Right-click (or control-click) the application in question and choose “Open”
Click the “Open” button at the next dialog warning to launch the app anyway
You can do this with any third party app that gives you this warning dialog and open it anyway.
If you get tired of constantly right-clicking apps to open them,
return to pre-Mountain Lion levels of app security by turning off
Gatekeepers app verification completely.
 Microsoft
 Microsoft


